v1.0 3D-printed flanged rail to cast working plaster jigger molds
Monday 2nd December 2019
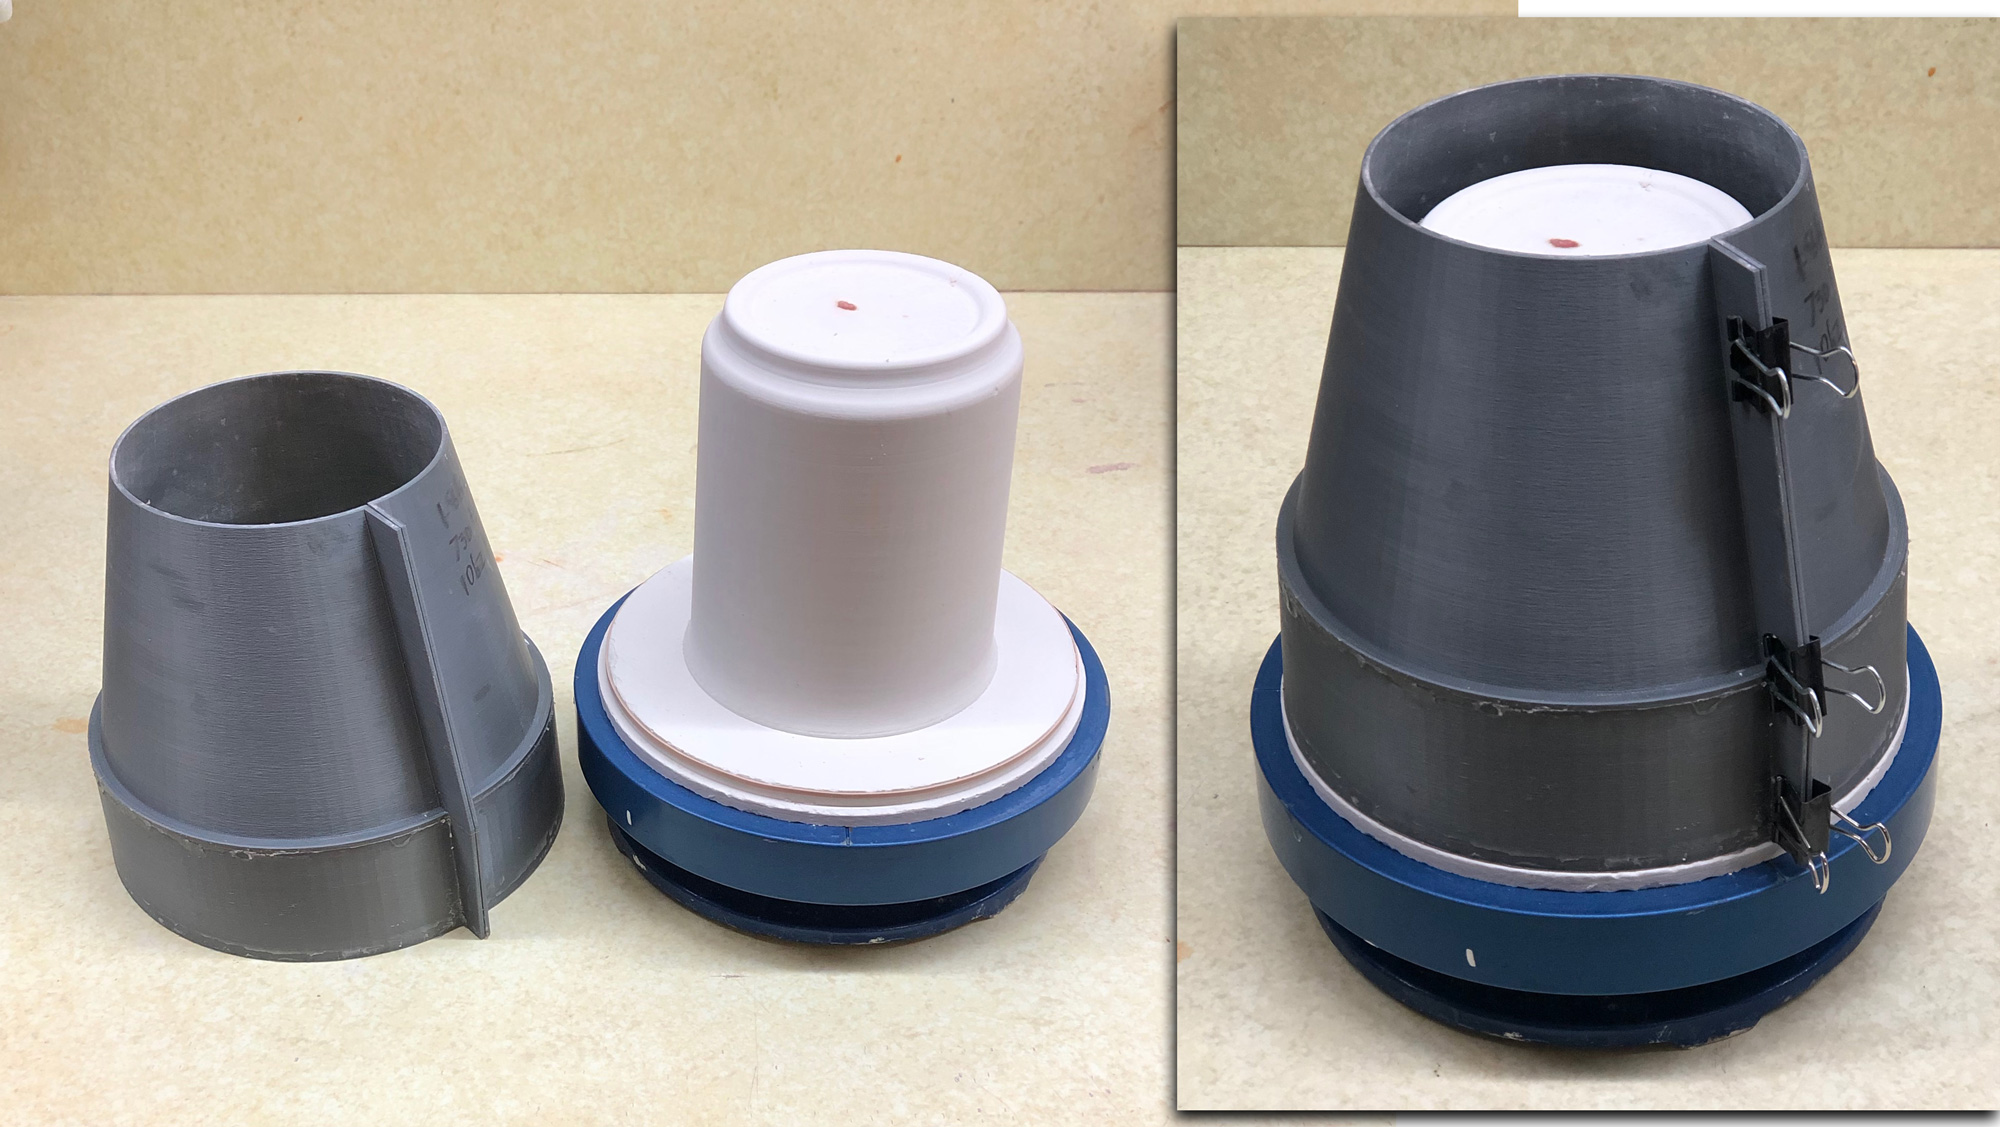
The multi-use grey outer rail on the left was printed in two parts and glued together at the shoulder (to avoid the printing of support). The wall thickness is 1.6mm, actually too thick for fast printing. For v2.0 we went to 1.2mm and printed it upside down, in one piece, on a flange (this generated support but new printers to that so well that the step disconnects well and is not rough). The vertical split enables opening the shell a little after the plaster has set, quickly releasing it. The center model, of the inside contour of the mug, is integrated into a two-step base, it was made by casting the plaster inside another two-piece insight-live.com/glossary/267">3D-printed form. After removing that using a heat gun, I smoothed the plaster surface using a metal rib and trimming tool and then soaped it to ready for a pour. The mold shell is held securely in place by stretching a wide rubber band around the first step and clamping the shell into place around it. The assembly is then ready to be filled with plaster to make a jigger mold. Doing this on a turntable is also a good idea - it enables rotating it while filling and agitating after full to dislodge any air bubbles.
Pages that reference this post in the Digitalfire Reference Library:
v2.0 3D-printed flanged rail to cast working plaster jigger molds, 3D printed three-piece jigger case mold complete, Jiggering, Casting-Jiggering, Side Rails, Mold Shell Flange, 2019 Jiggering-Casting Project of Medalta 66 Mug

This post is one of thousands found in the Digitalfire Reference Database. Most are part of a timeline maintained by Tony Hansen. You can search that timeline on the home page of digitalfire.com.