3D printing a propeller for our lab mixer
Tuesday 5th March 2019 Click to play
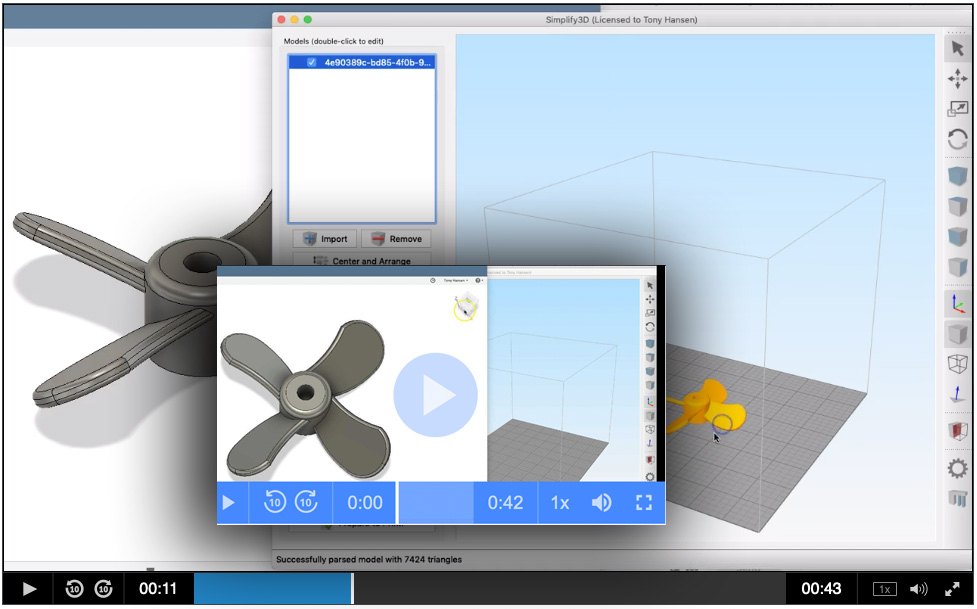
It has already been drawn using insight-live.com/picture/2453">Fusion 360. Choosing Make -> 3D Print, then selecting the propeller and clicking OK handed the 3D geometry off to Simplify 3D, the software that actually ran the printer. Within Simplify 3D the object can be positioned and reoriented on the bed and set to print solid or with infill. A moving slider can animate how the printing will be done, layer-by-layer. I had the printer directly connected via a USB cable so it was just a matter of clicking to start the print. The process begins by preheating the bed and head, the actual printing took about 15 minutes (with printed support under each blade). This fit tightly on the shaft that lasted months of everyday use! A replacement lasted many months more. By that time I had a stainless steel one printed at a service provider.
Pages that reference this post in the Digitalfire Reference Library:
Printing a prototype propeller for my Lightnin lab mixer, Make a useless Amazon mixer useful with a 3D printed propeller, 3D Printer

This post is one of thousands found in the Digitalfire Reference Database. Most are part of a timeline maintained by Tony Hansen. You can search that timeline on the home page of digitalfire.com.